All,
As promised, here's the first batrep, and, as promised, I went with the vote winner. There was all of one vote, so it made it pretty easy for me to tabulate. The good Mr. Thomas Nissvik requested anything FFL, and so here we are, stuck in Perplakistan, a former French colony in Northern-Middle-not too far East nor Western North Africa/Southwestern Asia.
First, let's start with an admin note; here's a better picture of my new desert game mat. This pic looks a lot more like it does in real life, though it's still a little off.

An overview of the table. It's about a 4' x 4,' with French coming from the bottom (let's call it south), with the insurgents' baseline being the top (north). Please forgive me as my desert game wan't real well thought out, that is to say, I had to do a lot of improvising regarding terrain. At top is the village of Kaplaxia, with a fair number of civilians running around, of which the French must take great care to minimize collateral damage to property and absolutely make sure to not injure any of the villagers. I'm using my regular roads, and my regular river sections are canals. There are a couple of crop fields, and I'm using cut-up pieces of rug for a couple hills. Got my regular walls around the village, and the fountain; the buildings are hilarious... I took a Jenga set and glued it together with wood glue, put some index card walls around the roofs, spray painted them khaki, then took a Sharpie and colored in doors and windows. I made some berms by molding modelling clay around some popsicle sticks then spraying them khaki as well. Then I've got a few bits of lichen floating around as some scrub brush.

Here's the insurgents' end of the table, centering on the village. The scenario is that, as so often happens, a former French colony finds itself in turmoil regarding some Islamist upstarts wishing to change the local government by force of arms. Not long afterward, the Legion is sent in, initially to protect French property and persons, and then to bolster the local government. In this particular case, the Legion has several sources reporting an arms cache in the/near the village of Kaplaxia. The FFL objective is to eliminate the cache (blow in place), inflict maximum casualties on the enemy, hold their casualties to a minimum, and do not become drawn into a protracted fight. As collateral damage is a concern, there will be no supporting (off-table) arms available. The white chips are insurgent blinds (there are eight, some of which are dummies), the red chips are potential cache locations (there are three), and the black chips are insurgent 'hotspots' (there are three). The insurgents will constantly receive reinforcements throughout the fight, with casualties being recirculated back onto the table, location (hotspot) determined by die roll. You can see my goofy, homemade buildings, some N-scale cars (model railroad), and the local citizens (they have the big, white bases, which I intend on changing at some point but will have to do for now).

The right side of the insurgent baseline.
A view from west to east (insurgent baseline on left, FFL to right). Oh yeah; the big greenish-gray crap running across the table is supposed to represent a wadi, which can be crossed by vehicles and troops at a penalty, while the canals can be crossed by troops (at penalty) but not vehicles.
The left side of the insurgent baseline, but looking from east to west (insurgent baseline at right).
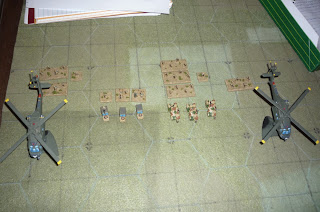
The FFL forces. They have a Blackhawk (yes, a Blackhawk) designated H1 (at left), carrying two rifle teams (Tm1 and Tm2) and a leader. To their right there are three Land Rovers; two soft back (S1 and S2), and one mounting a Mk-19 Grenade Launcher (S3). The first two carry weapons teams (a Milan and a MG), and the third carries a leader. To their right are three Panhards (V1, V2, and V3), carrying a rifle team each (Tm3, Tm4, and Tm5, and V2 also carrying a leader. The other Blackhawk, H2, carries the last rifle team (Tm6). Tm6 is carrying the explosives to blow the cache, so once it's located H2 will roar in and drop Tm6 as close to the cache as possible. The two helos will be available for extract, but ground extract is preferred as the FFL commander expects hordes of insurgents to close on the area, and the last thing he wants to deal with is a downed helo. The French, being Western, have the caveat that if a team is eliminated they must MEDEVAC the team (the insurgents don't have to bother with this, of course). The helos will be available for MEDEVAC, as well as any of the vehicles.
The FFL starts off-board, coming on in the first turn. The plan is for the three Land Rovers to dart up to the first hill (nearest the FFL baseline), deposit the leader, MG, and Milan, and have the Mk-19 take up a firing position while the two soft-backs (S1 and S2) scurry back down behind cover to await further orders. This position will provide a little cover for a base of fire and to spot a bunch of the blinds straight away. Following this, simultaneously H1 will dart to the top left corner (northeast) and deposit a leader and Tms 1 and 2, while the three Panhards (Vs 1, 2, and 3) charge straight up the road towards the village. The goal of each axis is to establish fire superiority as quickly as possible in order to set about searching for the cache as quickly as possible. There are several different plans for extract, depending upon the situation and the location of the cache.

The enemy, AKA, the Army of DUMDUM (okay, I couldn't be bothered to come up with a real name on the fly, so just pretend that's a cool acronym that shows their piousness and righteousness). There are four leaders, eight rifle teams (each with RPG capable of defeating any FFL vehicle/helo), and two Technicals, one with a 106mm recoiless rifle, one with a 12.7mm HMG. They will come on the table initially via the blinds, then at the end of each turn, any rifle team casualties will be diced for to come back on the table as reinforcements at one of their 'hotspots.' Sorry for the crappy pic...

The fight starts with S1 rushing to the top of the hill, spotting (of all things), both Technicals (RR at top right, HMG at top center). I was using a variation of Blitzkrieg Commander style activation, so you'll see a lot of moving up then doing nothing; that's because my variation is to give one 'free' activation then roll for additional activations. The plan was for S1 to drop some folks off, but he failed the roll...
S2 came up and dropped off the Milan, while S3 (with the Mk-19) moved up into position. S3 was going to fire at one of the Technicals, but failed its roll. So did the Milan...
The FFL commander, Major Lappieux, sent in H1, seen here swooping in low over the desert, nap of the earth-style.
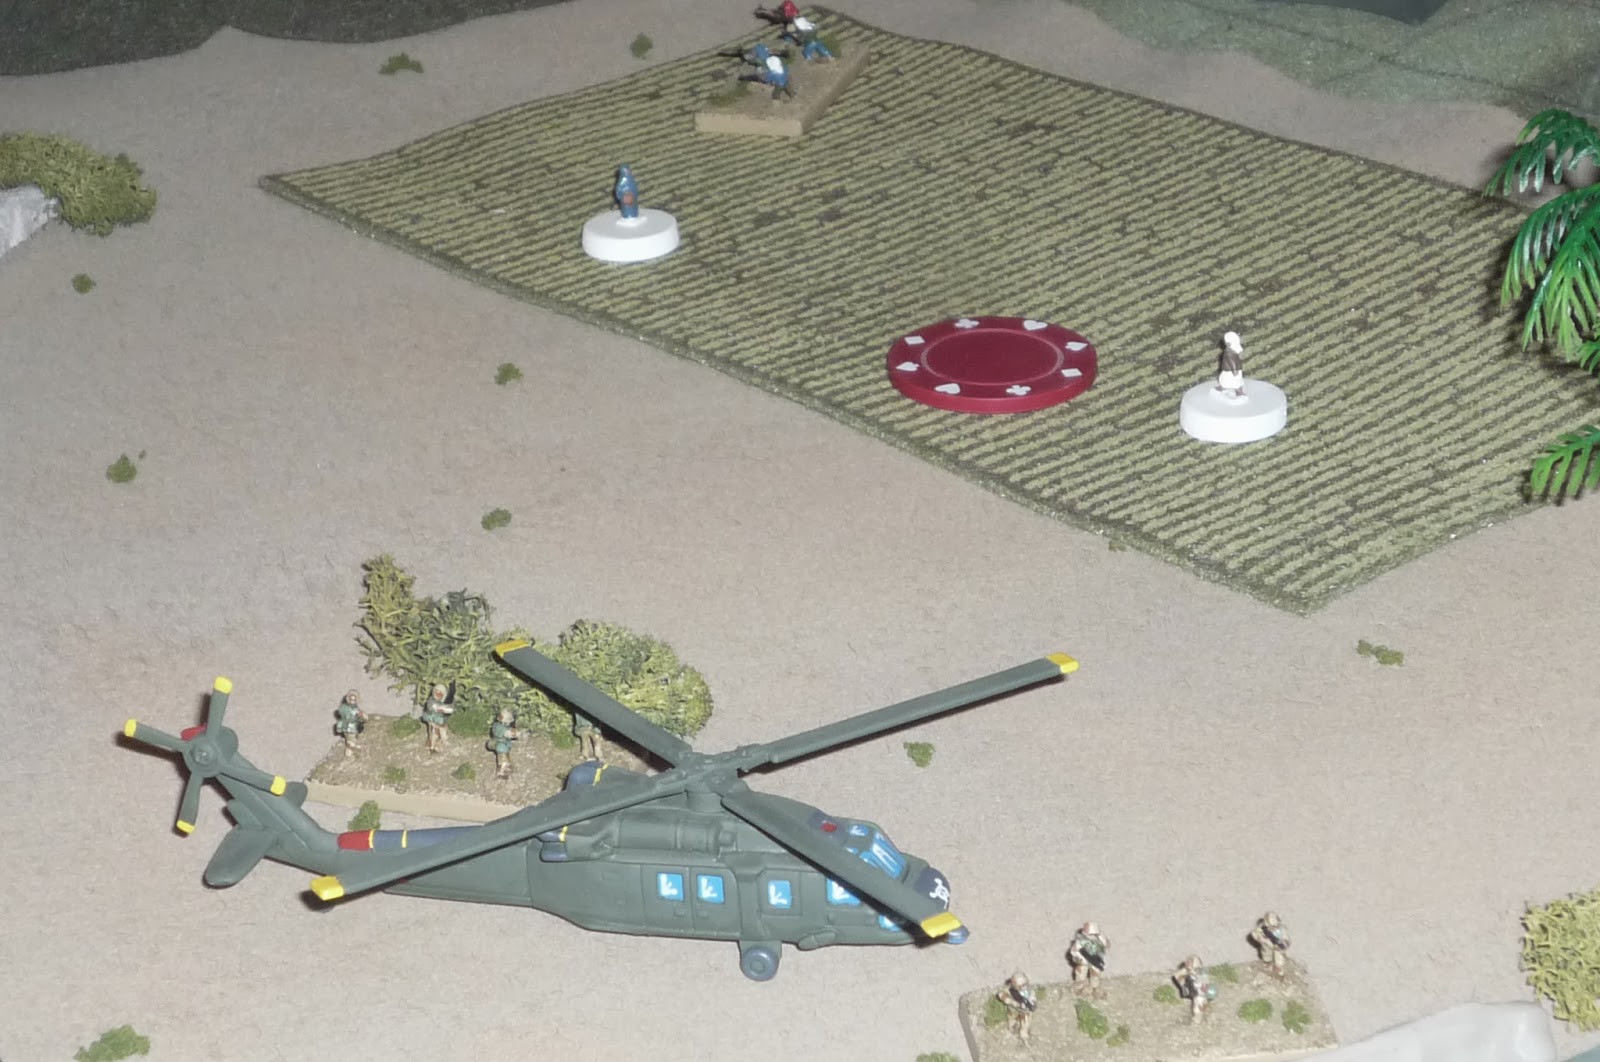
H1 passed another roll and thus was able to sit down and debark the leader and Tm1 (bottom, west), and Tm2 (left, north). You can see all the civilians. Also, at top center, another blind popped up an insurgent rifle and leader in the center building. You can't see it here, but off picture at bottom right is another insurgent team, guarding the suspected cache site.
Reverse angle, showing the other insurgent team (top center), the red chip denoting one of the suspected cache sites.
So, the leader and Tm1 move forward, trading fire with the insurgent team in the field, with Tm1 becoming pinned. But lo and behold, there's the weapons cache (rolled a 10 on a D10!). Tm2 (top left) has taken a hit in its exchange of fire with the insurgent team in the building.
Lappieux sends in the cavalry! The three Panhards go tearing down the highway towards the bridge. V1 halts to fire up one of the Technicals, fail, as does V2. V3 puts a round right close to the Technical on the right (RR), immobilizing and pinning it.
As they've found the cache, Lappieux wastes no timie getting at it, sending in H2 with Tm6 (and the explosives). H2 has a good set of rules, so gets there, sets down, debarks the troops, and gets back airborne. Tm6 (right, next to airborne helo) moves up and puts a hit on the insurgents in the field (off camera, bottom right). They moved up because they had to clear their field of fire around the civvie at bottom center. The insurgents in the building got a bit uppity and took a shot at H1 (still sitting on the deck), but missed.
The HMG Technical bounced some very large bullets off V1, to no effect, but V1 returned fire and sent them in search of virgins.
The RR Technical (top right) can't unpin, but an insurgent team showed up at the canal (top left) and hit S1, which saved (6 on a D6!). S3 dropped a bunch of 40 mike-mike rounds on them, but they shook it off like it was cool. MG and leader popped out of S2 and S3, respectively, and S1 and S2 fell back down the hill.
The Milan took a long shot at the insurgents in the building (the ones shooting at Tm2), and hit the building but not the insurgents (every time I missed I rolled to see if there were any civilian casualties).
Then the bad guys got their first set of reinforcements: 1 team at northeast (top right) hotspot, 2 at northwest (right next to Tm2), and 1 at the west hotspot (next to the canal on the left).
H2 got out of dodge, while H1 was only able to get airborne. Tm1 unpinned, and the insurgent team didn't, so Tm6 closed with them and put them some hurting on them. The newly arrived insurgent team in the west (foreground), decided to fire into the insurgent/Tm6 melee, pinning Tm6 and putting the insurgent team out of the fight. Tm6 rolled double 6s (I roll the other way, so if you're a BKC guy, think double 1s), so unpinned and put a hit on the insurgent team at the west canal.
Tm2 (top center) finds itself staring at two new insurgent teams on their hotspot (far left, black chip). They're able to put one hit on the first team, but the second wriggles it's way to their left, looking to get the drop on Tm1. Meanwhile, the insurgent douchebags in the building take another shot at H1 (still hanging around), getting two hits, but H1 rolled two saves (I really thought I was about to start playing "Blackhawk Down" when those two hits popped up).
The MG got in three rounds of firing on the insurgent team at the east canal, getting two hits, while S3 and its Mk19 get nothing in one round of firing then fail. V1 races over the bridge, pops Tm3 out (in the field at left), then puts a hit on the insurgents at the east canal.
V2 crosses the bridge, cuts left, gets to the top of the hill (next to west canal), and pops out Tm4 (top right, atop 'hill.' Bridge is to right). V2 and Tm4 light into the insurgent team at the west canal (bottom center), eliminating them. Tm4 then turns to their right and lights up into the insurgent team in the grove in the northeast corner, getting a hit.
V3 moves up to the bridge, then fails. The RR Technical (top center, whom I've been ignoring because they're beat up and pinned) unpins and fires on the MG team, pinning it. S3 and its M-19 fire on the RR Technical, but hit nothing... However, V3 snaps to and puts a 90mm round all up in their business. But then the insurgents at the east canal, barely hanging on, pop an RPG into V1, knocking out its main gun. V3 returns fire with its .50 cal, and Tm3 adds its firepower to this, eliminating the insurgent team at the east canal.
An insurgent team that came on on the northeast hotspot gets a couple good rolls and hauls butt around the north side (center left), but was a bit too ambitious and failed right as it got out in the open. Tm2 opened up, but to no effect.
The insurgents standing on the NW hotspot (top left) get three hits on Tm2 (top right), but it gets three saves! The insurgents in the building decide to cut H1 some slack and go after Tm2, but get no hits. The other insurgent team (center) unpins, but Tm4 (on hill with V2) pins them, then Tm1 (centeer) moves up and gets a kill, while Tm6 (with the explosives) moves to the weapons cache.
Enemy reinforcements roll in again, with 3 teams in the NE corner.
Tm6 begins rigging the cache to blow, and gets two actions, so it only needs one more (auto next turn). Tm1 continues close combat with the insurgent team in the grove, get two more hits on them, while Tm2 put another kill on the insurgent team still on the NW hotspot. Tm4 (on hill) puts two hits on the Insurgent team on the north side, while V2 (also on hill) pins the insurgents on the NW hotspot. The insurgents in the building fire on Tm2, to no effect, which in turn draws fire from the MG, Milan, and S3, getting two hits but not pinning them.
This is the NE corner, where three insurgent teams just came on as reinforcements. At bottom left are the insurgents "in the building," whilst the two above them are reinforcements. In the center, one of the reinforcement teams moved up and hit V3 (far right, with Tm5), damaging its engine.
Enemy reinforcements were only one team, on the NW hotspot.
The Milan, MG, and S3 got in two rounds of fire on the insurgents in the building (top center), but manage only one hit. V3 (bottom center) fires down the middle of the street, getting three rounds in, three hits. V1 (off camera at bottom right) fires its MG (main gun KO) down the street, hitting nothing, while Tm5 also shoots down the street, getting one hit. Return fire from the three insurgent teams pins both V3 and Tm5. Tm3 (off camera, bottom) also fires down the street, getting two hits and pinning one of the insurgent teams.
Lapieux, knowing Tm6 is almost finished rigging the cache for detonation, sends S1 and S2 over the bridge and to their left (S1 and 2 at center, V2 and Tm4 on hill at top left, V3 and Tm5 in foreground, Tm6 at top right with cache).
Tm1 (bottom left) eliminates the insurgent team it was in close combat with, while V2 (on hill, off camera to right) lights into insurgents at the NW hotspot, eliminating them in two rounds of firing, then miraculously getting another two rounds of firing (3 hits and pin) on the remaining NW hotspot insurgent team. Tm2 quickly finishes them off, swings back to the east (center left), and eliminates the north insurgent team. The insurgents in the building get a lucky shot on Tm2, pinning them. Tm6 finished rigging the explosives and moved next to Tm2. Tm5 (on hill with V2), starts its break on foot, and makes it all the way to the bridge.
The insurgents in the building fire at Tm2, missing, and Tm2 unpins while Tm1 and Tm6 fall back to south.
V2 moves down off hill to Tm2, while S1 and S2 move up to Tm1 and Tm6, making ready to get out of here.
The insurgents closest to V3 and Tm5 enters the building. The Milan, MG, and S3 try to help out but can't get a clear shot. V1 snap fires it's .50 cal and pins the insurgents. V3 and Tm5 both unpin and unleash fury down the street, getting a hit and pin.
Shot from behind Tm3 (bottom right) and V3/Tm5 (top left), lighting into the insurgent teams coming up the street.
Enemy reinforcements: 2 teams to the NW hotspot and 1 to the W hotspot, perfect for the bad guys. It would have really helped the FFL if these guys popped up on the NE hotspot, to far away to get anything done as the French are trying to leave town.
Starting off in the NW, Tm2 fires ineffectually at the 2 reinforcement teams that just arrived, then dashed into V2. V2 fires its main gun and pins one of the insurgent teams, then begins falling back. Tm1 and Tm6 load into S1 and S2 and they all start moving towards the bridge.
Milan, MG, and S3 go after the insurgents above V3/Tm5, getting two hits and pinning them. Tm4 fires down the street, eliminates one insurgent team, then loads into V3, who fires at the near building, getting a hit, then begins falling back (very slowly because of the damage). Tm3 (center) fires down street, eliminating the remaining insurgent team near the NE hotspot, then loads into V1 (bottom right, S1 is at left center).
The insurgent team at the west canal moves up, looking to get a line on the vehicles as they cross the bridge. Tm4 sees this and crosses bridge (to south) and moves into position to engage them (bridge is to right).
There's quite a kerfuffle as all the FFL vehicles continue hauling ass towards (and over) the bridge, and various insurgent elements continue to charge into the open and fire RPGs at the fleeing vehicles. There are a couple near misses, and particularly close call when the insurgent team on the rooftop unpins and fires at V3, pinning it; but V1's .50 cal. once again saved the day, pinning the insurgents until V3 could get its act together and get over the bridge. The MG and leader on the SE hill fall back on foot, while the Milan mounts S3, who launches a whole box of 40mm grenades before falling back.
Tm4 keeps the west canal insurgent team (top left) pinned while just about everyone gets off the map, but V3 is slow (damaged), and so there's a little drama as the insurgents try to unpin and get an RPG at V3, but it's able to make it off the table.
A crowd of insurgents begins inspecting their weapons cache, curious as to why the French left in such a hurry...
Oh, that's why! Sorry, it seems every time I play a modern game I have to use all my cotton balls to make a cheesy, gi-normous explosion.
That was a lot of fun, and, to tell you the truth, the dice were with me as that went a lot smoother than I thought it would/it should have. Finding the weapons cache right off the bat was a huge deal, as I likely would have gotten bogged down in heavy fighting in the village if that wasn't the case. And if you're fighting in the village, there are two hotspots behind you for insurgent reinforcements. Another big deal was that both Technicals popped up right away (first two units spotted); this actually worked to my favor, seeing them and then eliminating them rather quickly and painlessly. The bad guys also missed several RPG shots at my helicopters, particularly as H1 sat there on the deck for pretty much two turns.
Tactically, I liked my plan, stuck to it, and it worked pretty well. The only thing I wasn't happy with my handling of the withdrawal. I planned, and it should have been much more deliberate and orderly. Instead it turned into something of a mad dash to get off the table. If one of those enemy teams would have gotten a lucky shot in that disabled or destroyed a vehicle (during the withdrawal), things could have gotten really bad as the French HAD to extract everyone. That was another thing I got lucky with; while the FFL took casualties, no units were eliminated, so I never had to jump through the goat-rope of having to conduct a MEDEVAC under fire.
I threw those rules together in about 10 minutes before starting the game. Activation worked well, but needs to be refined a bit. I wasn't happy with the shooting; it made for very attritional fighting, as opposed to quick and dynamic. Again, this probably helped the French. Easier to lose FFL units that way, forcing MEDEVAC (and thus degrading combat power by the unit lost and the unit conducting MEDEVAC), plus, the faster insurgent teams were lost, the faster they would have been fed back in as reinforcements. I feel the shooting rules would work great at a higher echelon, but didn't feel right for individual teams.
I hope you enjoyed it as much as I did. What will I do tomorrow?
V/R,
Jack


No comments:
Post a Comment