All,
So, welcome to the inaugural fight of my "Hell on Wheels" campaign. The concept is following a US mechanized infantry task force in France, late August 1944, through a series of fictional, yet historically based/representative fights against the Germans. To see the task force's order or battle you can visit the earlier "Hell on Wheels OOB" post, which shows the units and leaders. As merely a plot ploy, the Yanks will primarily find themselves facing off against a single German unit lead by Oberst Fritz ;)
So, today's fight is just following Falaise, let's say 24 August 1944, with US forces working on breaking out of Normandy.
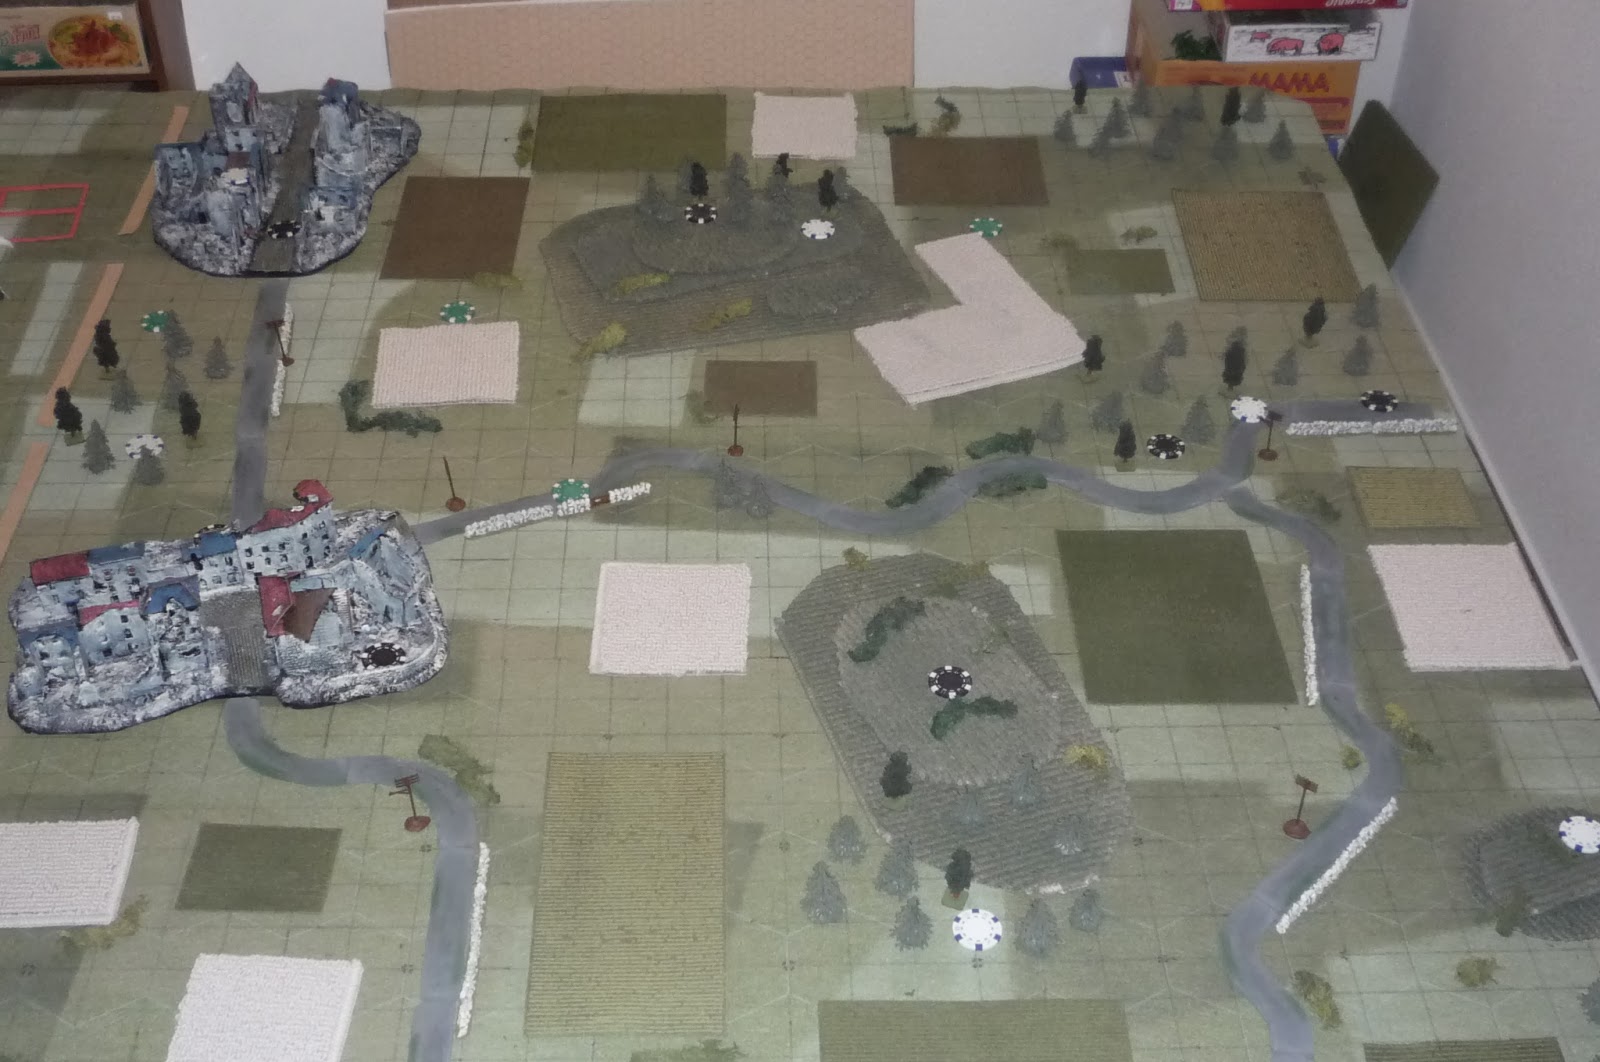
Table, from US baseline looking towards German baseline. You may have to right click and open in a separate window in order to get a pic large enough to see the legend.
Looking west to east. Village of Mais Non in foreground on Highway 1, with Hill 60 at center left, Hill 55 at top center, Hill 30 at top right, and Hill 45 at center right.
East to west, Hill 55 at center, Hill 60 at center right, Hwy 2 in foreground with Hwy 3 running from Mais Non at top to bottom right of photo.
Looking north from German baseline, with Hill 60 in center, village of Mais Oui at bottom right, Hwy 3 running left to right.
US forces. Overall scheme is pretty simple; two rifle companies abreast, each with a tank platoon in support, with ATGs, battalion (Weapons Company) mortars, and M10 Tank Destroyers in general support, and one company in (off table) reserve.
On left, going up Hwy 1: On right, going up Hwy 2:
Able Company: Capt Dillon Baker Company: Capt Keepers
1st Plt Lt Gwydion Lt Harwood
2nd Plt Lt Drakenganer Lt Tocapixie
3rd Plt Lt Womble Lt Technough
Wpns Plt Lt Freduelve Lt Lejunfore
1st Tank Plt Lt Ditteaux 2nd Tank Plt Lt Worlwind
*Each company has two MGs in their Wpns Plt, one is their own, the other is attached from Wpns Co.
*Wpns Co 81mm mortars are in general support on table.
*The Bn FO, Capt Jonafem, is in general support on table.
*Wpns Co ATGs are in general support, off-table but on call
*Tank Destroyer Plt (Lt Ithoriel) is in general support, off-table but on call
*The Bn CO, LtCol Mac, pulled himself away from the chowhall long enough to get involved in the attack today.
*The rest of the battalion task force is off-table in reserve, hopefully not needed but standing by in case things don't go well...
*All US forces start off the table, coming on when activated.
All German forces start off table as well, represented by blinds. Once spotted I will be rolling on a modified Plt Forward table to determine what the enemy blind represents. This is looking from the US baseline: white chips are Type A blinds (infantry platoons or dummies, there are seven of them); black chips are Type B blinds (MGs, mortars, anti-tank guns, there are seven of them); and green chips are Type C blinds (armor or dummies, there are four of them).
Let's get this thing started!
The action starts with Lt Gwydion leading Able Company's 1st Plt up the left side, but they only get one action (bottom left), so Lt Dranenganer takes 2nd Plt up past them and spreads out a bit. On the far right, Lt Womble moved 3rd Plt up, then failed the command roll (CR), while Lt Freduelve's Wpns Plt moved up in the center all the way to Hill 45 (top center). Lastly, the Able Co commanding officer (CO), Capt Dillon, came on, joining 1st and 2nd Plt's on left.
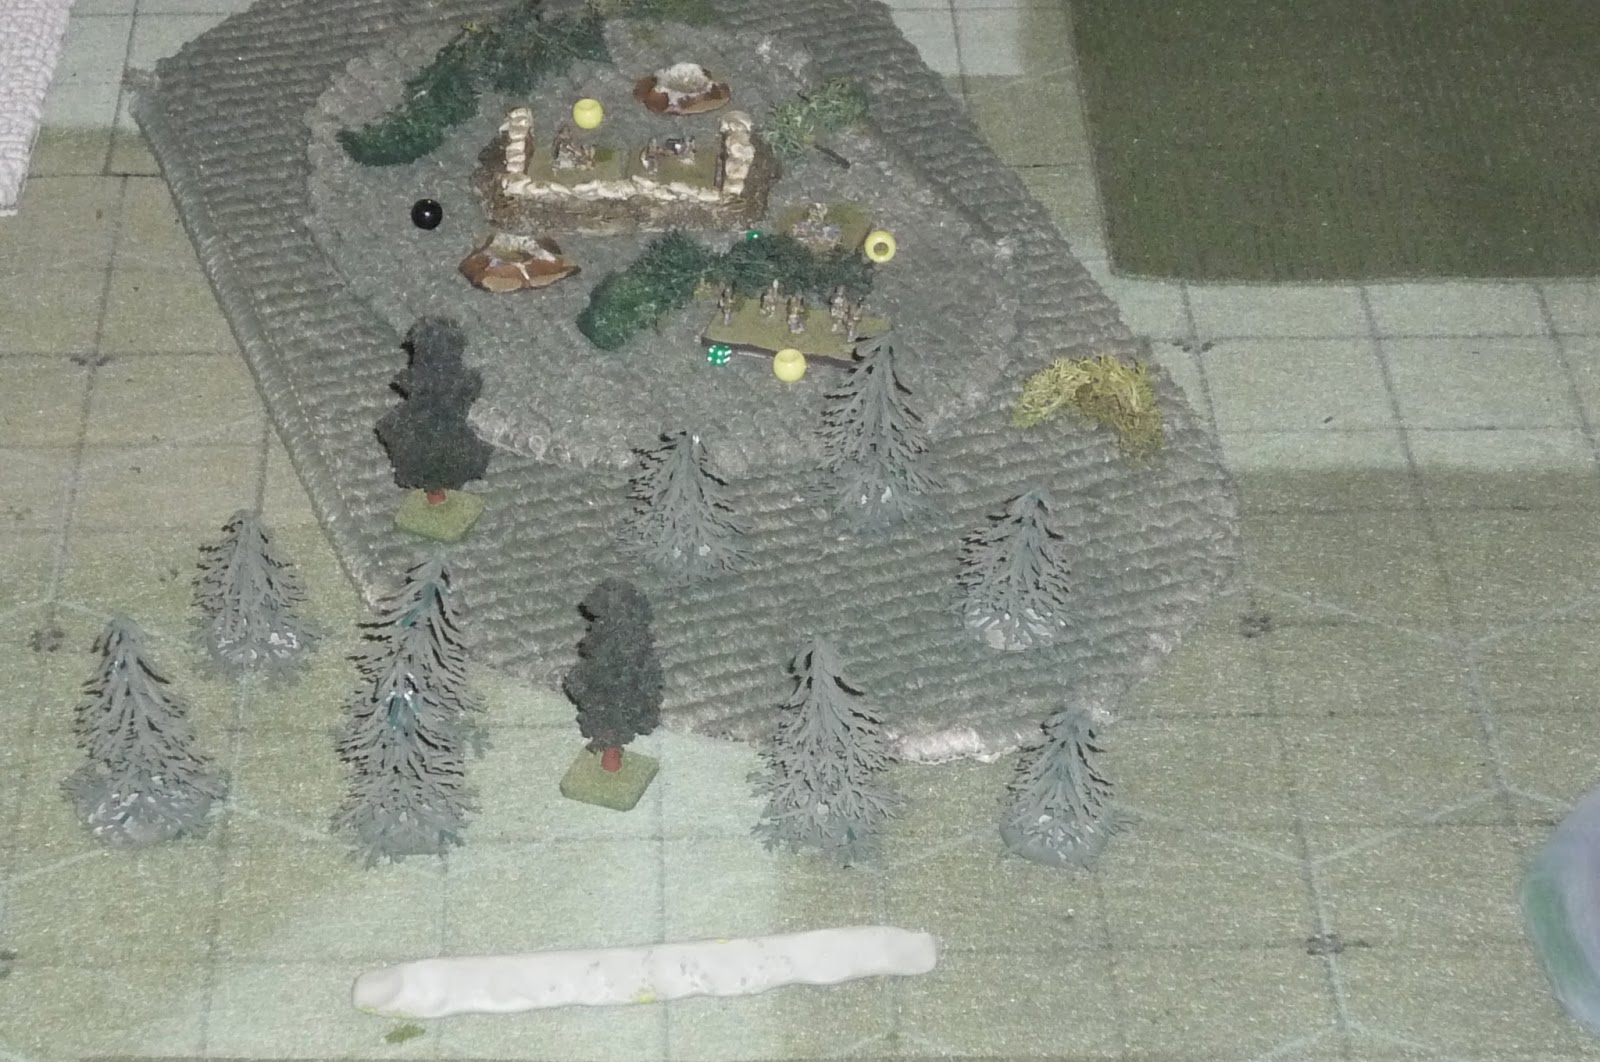
On the right, Baker Co got to work. Lt Harwood brought 1st Plt on, barely (bottom left), while Lt Tocapixie brought 2nd Plt on in an hurry, getting up to the wall on Hwy 2 (center). This caused some spotting to occur, which brought out an enemy rifle platoon with Company Commander (CC), top center, dug in, and off camera to top right...
A German MG platoon (bottom left) and mortar platoon (center, with an unspotted Type A still sitting there). The German rifle plt fires at B/2nd Plt, but manage only one hit.
Then Lt Tecnough brought his 3rd Plt on (bottom right), but didn't get very far, while Lt Lejunfore brought Wpns Plt on next to 3rd Plt. Lejunfore gets his two MGs and his 60mm mortars going against the dug-in German rifle plt (top center), getting a couple hits and pinning a couple squads. B Co CO, Capt Keepers, comes on and joins Harwood's 1st Plt in the crop field on left.
Lt Ditteaux's 1st Tank Plt comes on with Able Co on Hwy 1, and out pops...
A dreaded 88mm anti-tank gun on Hill 60! It promptly slams a round into 1st Tank Plt's Tank number three (T3), knocking its main gun out and causing the crew to bail. Lt Ditteaux wants to have his remaining two tanks move up to his right to shelter behind some trees, out of LOS of the 88mm ATG, but rolls a blunder!
A single rifle shot rings out; SNIPER! Lt Ditteaux slumps down in his cupola. He's hit, but alive, and his crew off-loads him to one of A Co's medics (foreshadowing: this was very fortuitous for Lt Ditteaux!).
Lt Worlwin brings 2nd Tk Plt up Hw 2 in support of B Company. B/1st Plt is immediately to their left, with B/2nd Plt to their right. At bottom left corner is A/3rd Plt, and between the them are the Wpns Co 81mm mortars, which came on and went straight to work, getting a hit and pinning the 88mm ATG! That did it for the US turn.
In the center, the German Co CO (center) tries to unpin his rifle squads, but fails, though they both unpin themselves. The rifle platoon then opens up on B/2nd Plt (bottom center behind wall), getting three hits and pinning a couple squads. The rifle plt's Panzerschreck (PzSchreck) fires at T4 (Lt Worlwind's tank, off camera to bottom), but misses. B/2nd Plt's return fire is ferocious, rolling five 6's, but the German MG Plt (top right) hits them, getting three more hits and eliminating a rifle squad... 2nd Tk Plt's T4 and T6 have LOS and return fire, eliminating one of the MGs and pinning the other, though it unpins and lets Tocapixie's 2nd Plt have it again!
Back on the left side, the 88mm ATG manages to unpin, and pops T2, immobilizing it and causing the crew to bail. That finished the German turn.
Lt Womble continued A/3rd Plt's cautious advance into the woodline (bottom right, in front of T1), while Wpns Plt moved atop Hill 45 (bottom left) and spotted another German MG Plt on Hill 55 (top center). Fire is exchanged, with both sides taking hits, with one of the US MGs being eliminated.
T1, hoping to get out of the 88's line of fire, swings right, putting a clump of trees between him and the enemy ATG. It then fires at the dug-in German rifle plt, but get no hits. However, the German plt's PzSchreck returns fire and turns T1 into a funeral pyre.
Able Co's CO, Capt Dillon is understandably worried about the German MG Plt that just materialized on Hill 55, and attempts to call in arty, but FAILS. The Wpns Co 81mm go after the 88 ATG again, getting two more hits and pinning it again.
On the far left, A Co's 1st Plt starts moving forward. At first Lt Gwydion has them creeping up, then a little further, then he says hell with it and has them double time forward to get out of the field of fire of the MGs on Hill 55, but they run into a German rifle plt in the village of Mais Non! The Germans open up, but somehow manage only one hit and pin one squad. The CR turns up boxcars, so 1st Plt opens up a ferocious fire (6 hits and a pin), then rushes into close combat, taking a hit while eliminating the German squad.
They then move up and shoot it out with the remainder of the German Plt, getting a remarkable 10 hits, but the Germans roll 9 saves! The Germans get a couple hits on 1st Plt. Just off camera to right, Lt Drakenganer brings 2nd Plt forward, albeit a bit more cautiously.
At this point the big dawg, the Ol' Man himself, shows up. LtCol Mac moves onto the table, confers with Able's CO (bottom left), then promptly calls in a fire mission on Hill 55! (Here you can see A Co's Wpns Plt beat up on Hill 45, with 3rd Plt lagging at right, and 2nd Plt at top left.
The US 105mm guns hammer Hill 55, eliminating one of the German MGs and pinning the other.
On the US right, all three tanks of 2nd Tk Plt fire on German infantry, getting several hits on both the rifle plt dug-in in front of Hill 55 and the MG plt dug-in at Hwy 3.
Then B Co's Wpns Plt gets in on the act, and the machine guns and 60mm mortars are ruthless, eliminating two German squads and forcing the PzSchreck, CC, and remaining rifle squad to run.
Wpns Plt moves up (bottom right) to re-gain LOS, and opens up again, getting a couple more hits on the same units, now on Hill 55 (top center). (B Co's 2nd Plt is still at the wall in center, with 1st Plt to their left and 3rd Plt off camera behind Wpns Plt).
Lt Harwood gets 1st Plt moving, all the way up to the positions just abandoned by the German rifle plt (top), while Capt Keepers moves right and rallies 2nd Plt, then gets them moving forward, while Lt Tecnough gets 3rd Plt moving up the right side (boxcars again, top right). The Bn FO, Capt Jonafem comes on and moves up towards 3rd Plt.
On the German right, the German CO, Oberst Fritz (far left) rallies the remainder of the German rifle plt in Mais Non, then falls back to avoid being captured by A Co's 1st Plt (bottom right), like the cowardly fascist he is! The recently unpinned rifle plt remnants fall back out Mais Non into the trees (at center), while the 88mm ATG tries to unpin but can't.
In center, on Hill 55 (bottom center), the German Company CO tries to get things reorganized, but is having a rough time. the MG-42 unpins and goes after A Co's 2nd Plt (top center, village of Mais Non is at top right), getting a hit, while return fire gets two hits, but the German MG activates again and gets another hit and pins a squad. The PzSchreck on Hill 55 manages to unpin, but the rifle squad can't.
The German 80mm mortars fire on B Co's 2nd Plt, but only get one hit and pin a squad. Then the Germans bust out the whooping stick!
It seems Oberst Fritz has been on the phone with his creepy Nazi buddies and has managed to call up some help, in the form of two Tigers and another rifle plt (this is between the villages of Mais Oui, on left, and Mais Non, on right).
The armored force moves up (Mais Non is at bottom right, Hill 55 at left center) and lines up shots on Lt Worlwind's 2nd Tk Plt (top center), T6 is a on fire while T4 gets its main gun knocked out. Worlwind and his crew stay in the tank, but dodge to their left behind some trees, and T5 darts ahead and to its right, staying masked while trying to get on the Tigers' flank.
Then the Tigers roll a blunder! They must make two moves towards the nearest enemy and are then pinned. This is them coming around the west side of Mais Non...
Which gives A Co's 1st Plt bazooka a flank shot, and...
2nd Plt's bazooka a head-on shot.
1st Plt's bazooka penetrates the flank of one Tiger, setting it on fire, while 2nd Plt's bazooka damages the other Tiger's optics (-1 'to hit' for rest of game).
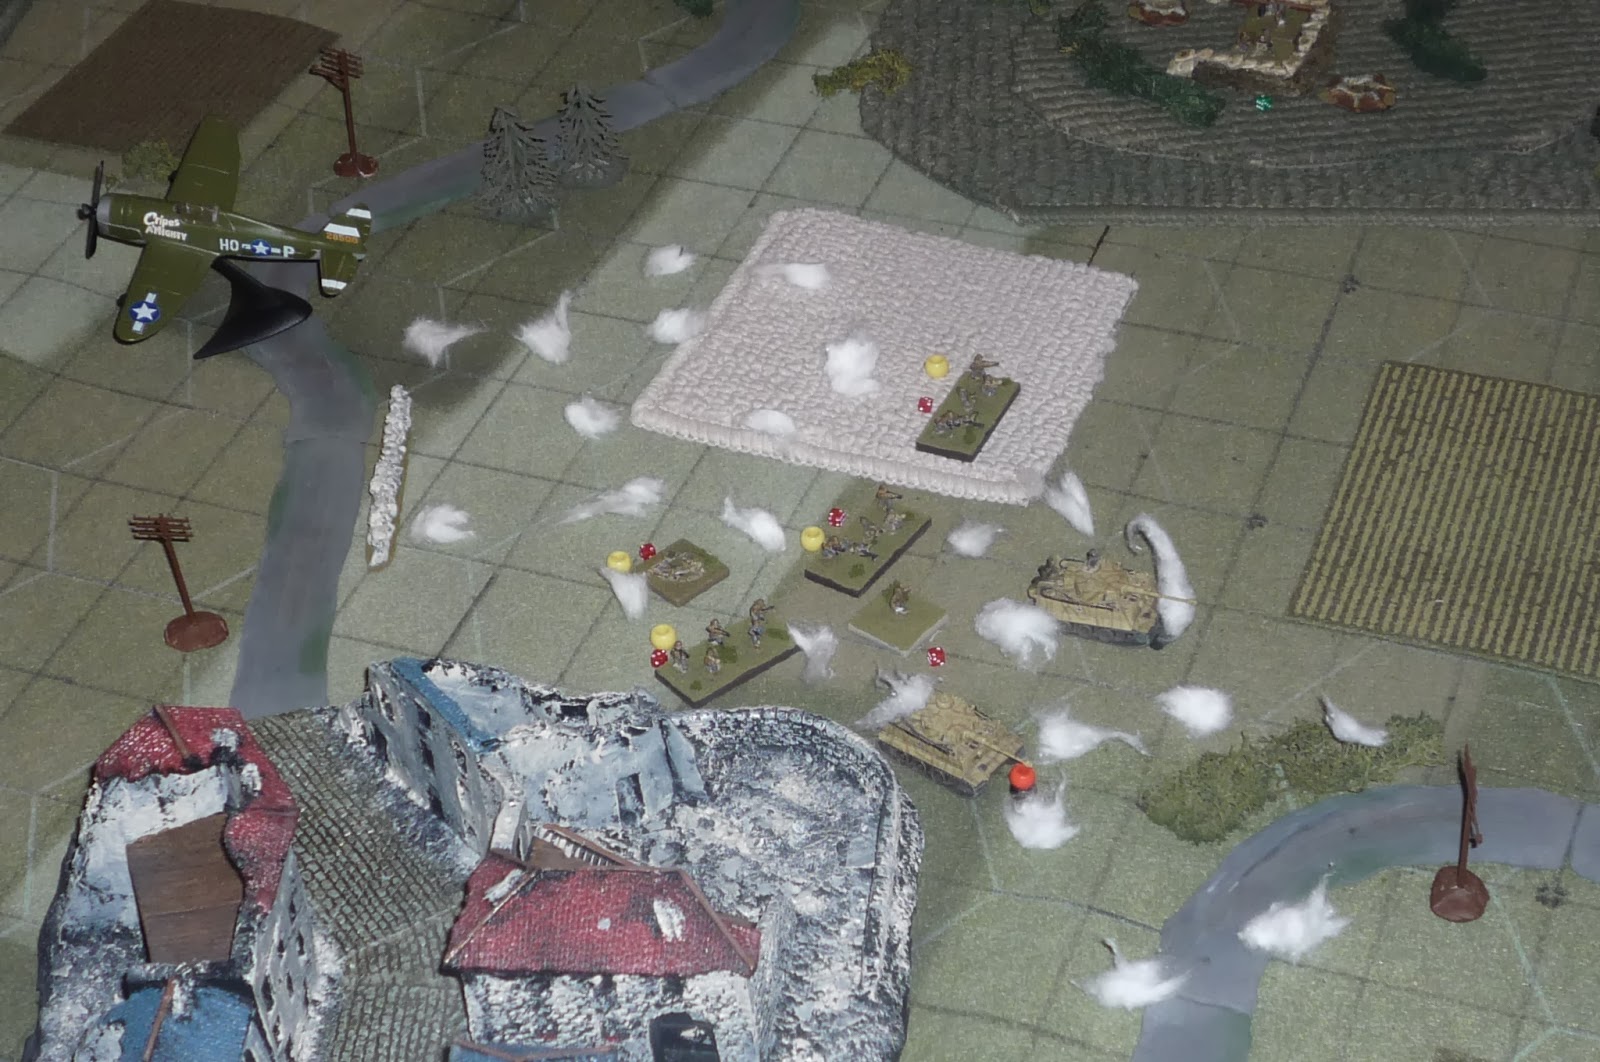
Just then the Bn CO comes on the net to tell everyone to get their heads down, fly-fly boys are on the way, and a flight of Jugs swoops in!
And they made quick work of the German armored force. The surviving Tiger's gun is KO'ed and so the crew heads for the hills. Then the Wpns Co 81's pound Hill 55, eliminating the MG-42 there, while Lt Freduelve unpins his remaining MG. The MG and 60mm mortar goes after the remnants of the German armored force, mowing down a team and causing a couple more to run.
Capt Dillon sprints up to his 2nd Plt, rallying them, then sprinting up to take on more survivors of the German armored force (boxcars again!). Drakenganer's 2nd Plt (center, with 1st Plt at bottom left) gunned down 2 rifle squads and a PzSchreck (top center).
Lt Gwydion tries to unpin one of his squads, but can't and the rest of the Plt moves forward (center), where German opportunity fire is ferocious, pinning two squads, but their bazooka team fires and pins the German rifle squad (far left). On A Company's right, 3rd Plt continues to inch its way forward ever so slowly...
B Company's Wpns Plt goes to work, whooping ass. The MG position is eliminated (center), as are the rifle squad and PzSchreck on Hill 55 (bottom left), and the German Company Commander is sent scurrying away (center left). However, the German 80mm mortars respond, getting a hit on both MGs and pinning one.
Lt Harwood continues to break his foot off in the ass of B/1st Plt, getting them up atop Hill 55 (center left), while Capt Keepers ensures 2nd Plt is properly motivated and moving forward (bottom left). Lt Tecnough gets 3rd Plt up and on top of Hill 30 (bottom right), while the sole remaining operational tank, T4, moves up to the wall (center) and takes a shot at the 88mm ATG, to no effect (2 hits, 2 saves).
Oberst Fritz (bottom left) moves to the 88mm, but can't unpin it. It unpins itself but fails its next CR.
Over on the outskirts of Mais Non, the Germans and A Co's 1st Plt shoot it out, beating each other up, but nothing decisive.
Just a second ago, in the center of this picture was a pinned German rifle squad and the German Company Commander. But they were caught in a crossfire between B Co's 1st (top right) and 3rd Platoons (off camera at top left) and eliminated. The German 80mm mortars (bottom left) fired on 1st Plt, but managed only one hit and a pin.
But once again Oberst Fritz has something up his sleeve, and up pops more armor and infantry at the base of Hill 60 (center right).
Three PzrJgr IVs and a platoon of infantry.
They roll well, perhaps too well, and move too far too fast, exposing themselves, and fire is exchanged. T4 (bottom right) bounces a round off one of the PzJgrs, pinning it, while the bazooka team belonging to B Co's 1st Plt puts a round into another PzJgr, blowing it up! The remaining PzJgr fires at T4, but misses.
Additionally, Harwood's riflemen exchange fire with the German infantry support.
Then Captain Jonafem (bottom center) moves up to the wall next to T4 and calls arty in on the German armored force (top center, with B/1st Plt at center left).
The results of the arty barrage: the previously pinned PzJgr is now pinned and immobilized, while the remaining PzJgr has its optics damaged and is pinned. The infantry took a lot of hits and pins, and two of the rifle squads ran for the hills (left).
The Bn 81's went after the 88mm ATG and busted it wide open.
A Co's 60mm mortars went after the German infantry in the forest opposite A Co's 1st Plt in Mais Non, getting a hit and a pin. And then Captain Dillon finally earned his pay, moving over to his 1st Plt and unpinning all three of its rifle squads. The Plt, under Lt Gwydion, eliminated the German PzSchreck with fire, then charged the pinned rifle squad (above), eliminating it.
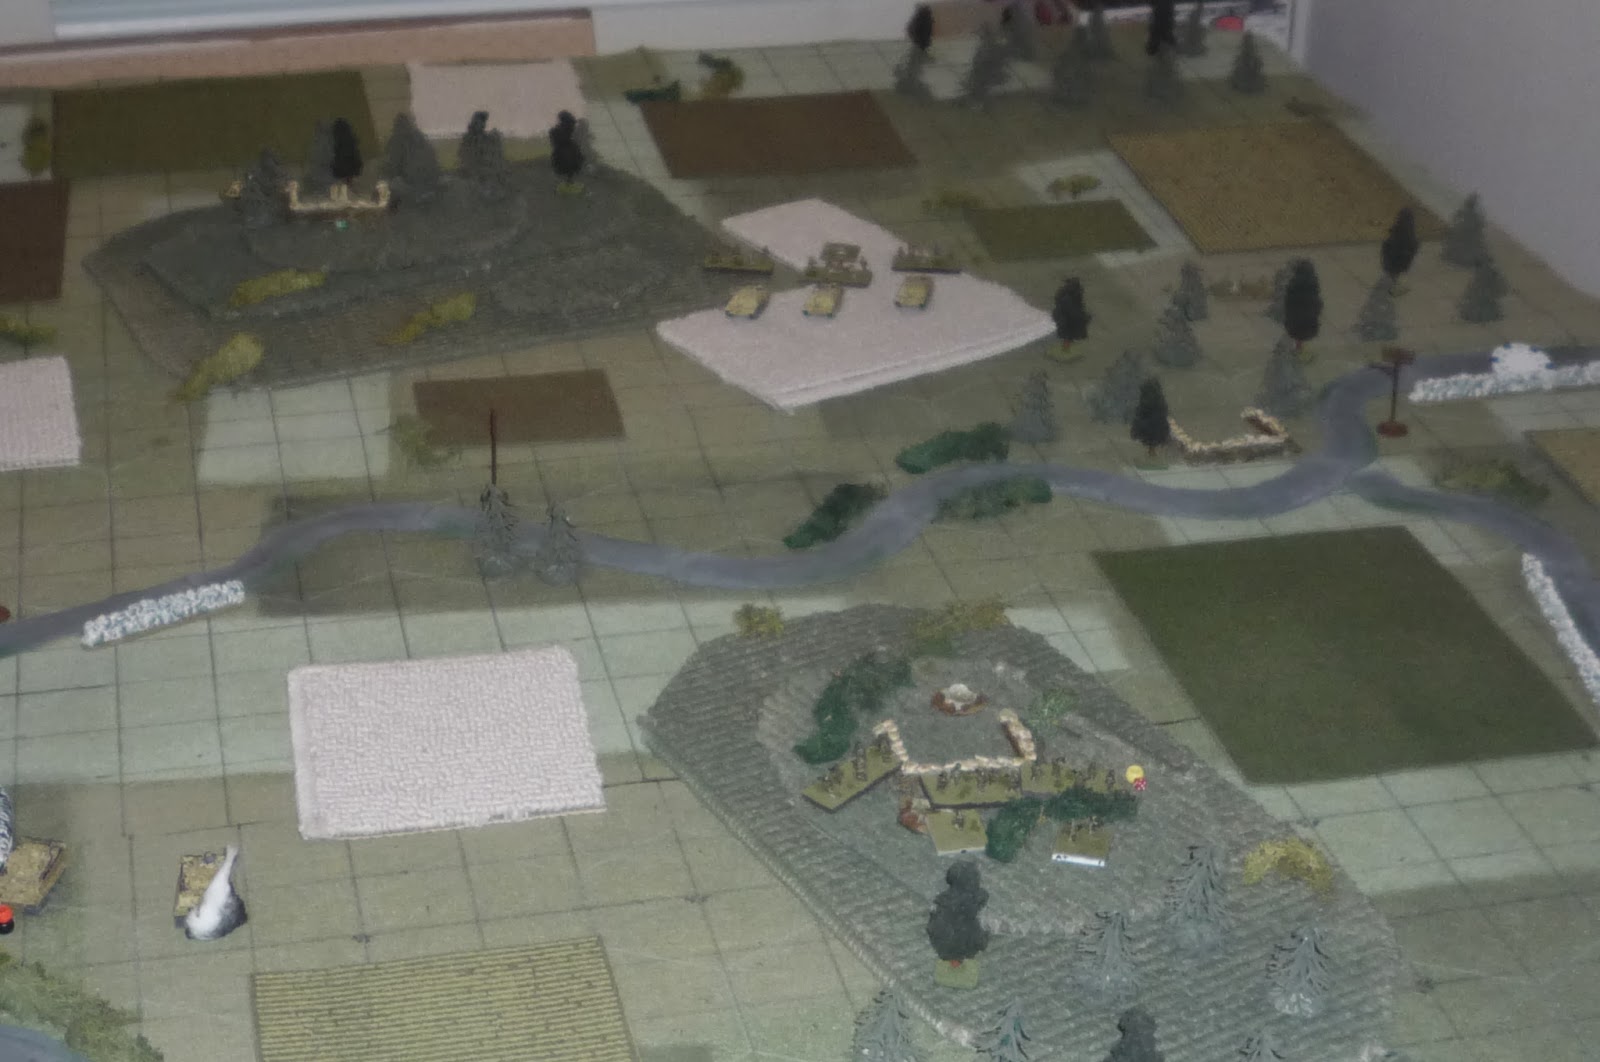
1st Plt passed another CR, and found itself about to move into the village of Mais Oui unopposed (looking from German baseline).
While A Co's 2nd Plt (bottom left) made a bold move towards Hill 60, flanking the remains of the German armored force (top center). The Germans, seeing B Co's 3rd Plt on their left quarter (off camera at top right), B Co's 1st Plt directly in front of them (right), A Co's 2nd Plt now behind them preparing to cut them off, and already beat up pretty bad, decided discretion was the better part of valor and packed their things and left (on foot).
Oberst Fritz (bottom left, next to burning 88mm ATG position), sees A Co's 2nd Plt (top left) coming for him, and A Co's 1st Plt (top right) marching down Mais Oui's Main Street, decides this day's fighting is finished.
German Casualties US Casualties
11 Rifle Squads A/1st Plt (Gwydion) 14 men
3 PzSchreck A/2nd Plt (Drakenganer) 4 men
4 MG-42s A/3rd Plt (Womble) None
1 Company Commander A/Wpns (Freduelve) 6 men (1 MG)
2 Plt Commanders B/1st Plt (Harwood) 6 men
1 PzJgr KO B/2nd Plt (Tocapixie) 18 men
2 PzJgr damaged/abandoned B/3rd Plt (Tecnough) None
1 Tiger KO B/Wpns (Lejunfore) 2 men
1 Tiger damaged/abandoned Wpns Co - 4 men
1 88mm ATG KO 1st Tk Plt (Ditteaux) PC WIA, 1 M4 KO and 2 damaged
2nd Tk Plt (Worlwind) 1 M4 KO and 1 damaged
There will be no replacements prior to the next fight, so the platoons will look like this
A/1st: 2 squads
A/2nd: 2 squads
A/3rd: 3 squads
B Co: all platoons will have two squads.
Regimental maintenance crews are working on repairing three damaged and two KO'ed Shermans, but they won't be available for the next fight. T4 will be temporarily assigned to 3rd Tk Plt (Salt). Luckily Ithoriel's TD Plt and Lasthuzzer's SPG Plt are both fresh, as is Capt Ronan's C Company.
So, the fight was fun, although I feel like I cheesed on the two German armored forces. Of course, I didn't want to simply have them sit like anti-tank guns, I was trying to use them in the Germans' manner, as an armored fist for counterattack to throw the Americans back. This utterly failed both times, though it kinda wasn't my fault with the Tigers they rolled a blunder that forced them forward. The PzJgr force was really wasted.
And I feel pretty cheesy about supporting fires, too. Two arty barrages and an airstrike; not ahistorical, but kind of felt like cheating. I'll say that my feeling was the initial fire mission (on the German MG Plt on Hill 55) really saved my bacon, I'm not sure how I would have cracked that nut. Having tank support would have helped, but they were having their problems with the 88. The airstrike on the Tiger force and the fire mission on the PzJgr force weren't game changing, at least in my mind. The Tiger's, due to the blunder, were pretty well handled by infantry bazookas (and T4 moving around the flank) and their infantry was exposed (also due to the blunder). The PzJgrs weren't being handled as well, but it really felt like only a matter of time, with B Company in front of them in strength and A Company getting into position to flank them.
Looking over this, I don't know that you get the same sense I did when playing this. I really had the hell scared out of me at the beginning, racking up infantry and armor casualties very quickly without having even gotten off the start line, and the barrage on Hill 55 gave me a bit of breathing space. When the Tigers showed up I had another sinking feeling, but once that blunder occurred I was pretty confident they were handled, and I was never really fearful of the PzJgr force, it was more of a 'okay, let's do this again. When the Tigers came on I was an inch away from bringing on the M10s to try to stave them off. I'm still trying to figure out if I was lucky or unlucky that the Germans had one ATG, two MG plts, and a mortar plt. I kept getting scared more ATGs would pop up, but the Germans were probably better off with the MGs than ATGs.
Before I close, we need to have a battalion formation for awards:
For Lt Ditteaux, 1st Tank Platoon, Tank Company:
For getting shot by a sniper while standing tall in the turret.
For Lt Gwydion, 1st Plt, A Company:
For leading close combats to eliminate the German garrison at Mais Non, resulting in the liberation of Mais Non and Mais Ouis.
Overall a fun fight, looking forward to the next one.
V/R,
Jack


A fun read (as always)! And not most of the armour was destroyed like normal. If (when) I make it onto the table, I have a chance to survive!
ReplyDelete